Let’s say you have a folder full of images that you want to sequence together as frames in an animated GIF. You can find special programs online to do this, but with some of the new features of Adobe Photoshop, it’s quite fast and simple.
- Gather the images you want to animate into one folder.
- Click File > Scripts > Load Files into Stack. When the “Load Layers” window pops up, click Browse to select & open your image files, and then click OK. This should import the files you selected as individual layers in your document. Rearrange the layers into the correct order, if necessary.
- This next step differs depending on what version of Photoshop you have:
- For Photoshop CS5: Open the Animation palette (Window > Animation).
- For Photoshop CS6: Open the Timeline palette (Window > Timeline ).
- For Photoshop CC (Creative Cloud): Open the Timeline palette (Window > Timeline ). In the middle of the palette, you will see a button with a drop-down allowing you to choose either “Create Video Timeline” or “Create Frame Animation.” You want to choose & then click the Create Frame Animation button.
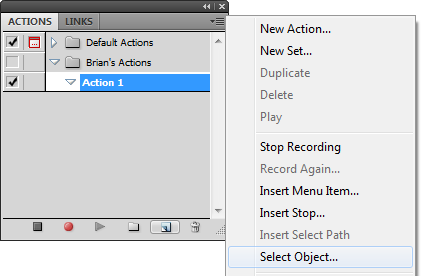
- In the Animation/Timeline palette menu (found under this button at the top right corner of the palette:
 ), click Make Frames From Layers. You can also click Reverse Frames if needed. This will take each layer in your document and set it as an individual frame in the animation.
 - Now we will change the duration of each frame. Make sure you are in frame view, not timeline view. If you do not see thumbnail icons of all your layers in the Animation/Timeline palette, click the icon in the lower right corner (the hover text will say “Convert to Frame Animation”). Now, back in the Animation/Timeline palette menu, click Select All Frames.
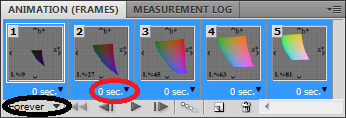
- Click the drop down button just underneath each frame image (circled in red in the image below). This will bring up a menu where you can set a duration. Since all frames are selected, all frames will be set to the same time. Each frame can be changed individually, if desired.

- The drop down button circled in black in the image above will change how many times the animation will loop; either a fixed number of times, or forever.
- Once the frame order and timing as been set up, it is time to save the image! Click File > Save for Web & Devices, make sure the file format is set to GIF, change any other options if needed, and save the image!
You will now have an animated GIF taken from a folder full of the individual frames. In fact, as long as each frame exists as a separate layer in Photoshop, the Animation/Timeline palette can be used to create the GIF. But, with CS5, CS6, or Creative Cloud (CC) it is easy to make separate layers from a folder of the individual frames as described.
If you want to add a transition effect to fade one frame into the following frame, please see my other post, Fade In & Fade Out an Animated .GIF in Photoshop.


